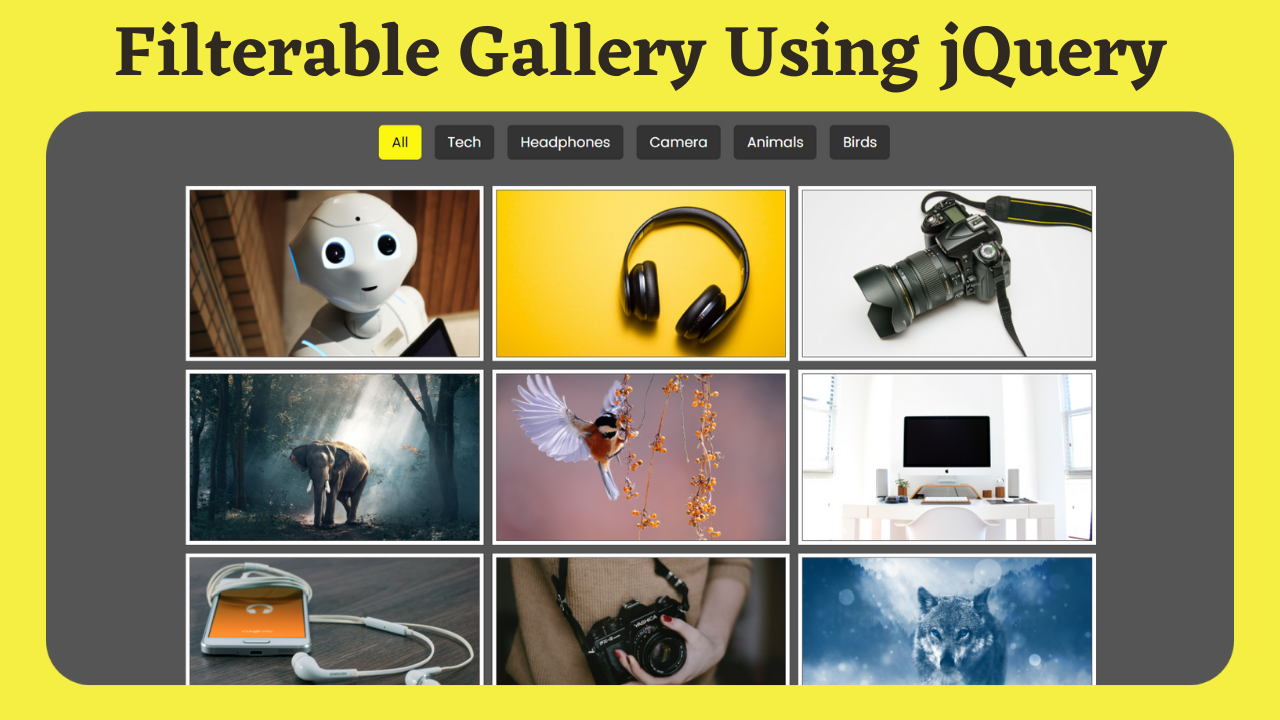
Do you want to display your artwork or digital images? We’ve got you covered! In this article, we will create the best filterable image gallery using HTML, CSS, and jQuery. You might have seen different categories of articles available on this site.
So why are filters important? A filter lets users sort objects (articles, images, products, etc.) based on the features or categories they’re looking for. For example, if I am interested in only seeing images of birds, I would not be interested in seeing any other images.
It can be very difficult to find exactly what you want if the site has a lot of content. Categories offer a powerful way to organize content. They allow the users to make their search time shorter by filtering specific categories.
Table of Contents
Introduction
An image gallery is a collection of images organized in a particular way, often with the intention of displaying them to others. Image galleries showcase a selection of photos with optional captions.
We will learn how to create a filterable image gallery using HTML, CSS, and jQuery. You can also create a Responsive Card Slider using HTML, CSS, and JavaScript while incorporating this filterable image gallery in HTML.
Watch the full tutorial on YouTube
Sometimes, watching a video tutorial rather than reading an article can help you understand the concept more easily. If you prefer that, I have created a video on the Filterable Image Gallery using HTML, CSS, and jQuery on my YouTube channel. You can access the complete source code here if needed. While you are at it, do subscribe and like the content.
Source code for the Filterable Image Gallery using HTML, CSS, and jQuery
Creating the HTML Structure
Create a file named index.html with the default boilerplate code for the HTML code of the filterable image gallery.
Create an unordered list with the class name ‘category’ for the filterable categories. For example, I have included categories like tech, headphones, cameras, animals, birds, and one to display all the images. Mention these categories in the data-filter attribute.
Then, create multiple divs with the class name ‘image’ plus the category to which it belongs inside a div with the class name ‘gallery’. For example, the class name will be ‘image tech’ if the category is tech.
Finally, add the jQuery CDN to add the filtering functionality. In the script section, create a function that executes when a category is clicked. Select the data-filter attribute, and if it has the filter as ‘all’, show all the images with an animation effect that takes 500 ms to complete.
Otherwise, hide all the images that do not belong to a specific filter with an animation effect that takes 400 ms to complete and show all the pictures that belong to that filter with an animation effect that takes 500 ms to complete.
Refer to the following code and paste it into the file named index.html:
<!DOCTYPE html>
<html lang="en">
<head>
    <meta charset="UTF-8">
    <meta http-equiv="X-UA-Compatible" content="IE=edge">
    <meta name="viewport" content="width=device-width, initial-scale=1.0">
    <link rel="stylesheet" href="style.css">
    <title>Filterable Gallery by Coding Power</title>
</head>
<body>

    <div class="container">
        <h2>Filterable Gallery</h2>
        <ul>
            <li class="category active" data-filter="all">All</li>
            <li class="category" data-filter="tech">Tech</li>
            <li class="category" data-filter="headphones">Headphones</li>
            <li class="category" data-filter="camera">Camera</li>
            <li class="category" data-filter="animals">Animals</li>
            <li class="category" data-filter="birds">Birds</li>
        </ul>
        <div class="gallery">
            <div class="image tech"><img src="images/tech1.jpg" alt=""></div>
            <div class="image headphones"><img src="images/head1.jpg" alt=""></div>
            <div class="image camera"><img src="images/camera1.jpg" alt=""></div>
            <div class="image animals"><img src="images/animal1.jpg" alt=""></div>
            <div class="image birds"><img src="images/bird1.jpg" alt=""></div>

            <div class="image tech"><img src="images/tech2.jpg" alt=""></div>
            <div class="image headphones"><img src="images/head2.jpg" alt=""></div>
            <div class="image camera"><img src="images/camera2.jpg" alt=""></div>
            <div class="image animals"><img src="images/animal2.jpg" alt=""></div>
            <div class="image birds"><img src="images/bird2.jpg" alt=""></div>

            <div class="image tech"><img src="images/tech3.jpg" alt=""></div>
            <div class="image headphones"><img src="images/head3.jpg" alt=""></div>
            <div class="image camera"><img src="images/camera3.jpg" alt=""></div>
            <div class="image animals"><img src="images/animal3.jpg" alt=""></div>
            <div class="image birds"><img src="images/bird3.jpg" alt=""></div>

            <div class="image tech"><img src="images/tech4.jpg" alt=""></div>
            <div class="image headphones"><img src="images/head4.jpg" alt=""></div>
            <div class="image tech"><img src="images/tech5.jpg" alt=""></div>
        </div>
    </div>


    <!-- jquery cdn link -->
    <script src="https://cdnjs.cloudflare.com/ajax/libs/jquery/3.6.0/jquery.min.js"></script>

    <script>

        $(document).ready(function(){

            $('.category').click(function(){

                $(this).addClass('active').siblings().removeClass('active');

                let filter = $(this).attr('data-filter');

                if(filter == 'all'){
                    $('.image').show(500);
                }
                else{
                    $('.image').not('.'+filter).hide(400);
                    $('.image').filter('.'+filter).show(500);
                }
            });
        });

    </script>
</body>
</html>
Styling with CSS
Create a CSS file named style.css and then link it to the HTML file. Do not forget this step; otherwise, the CSS styles won’t be applied.
Firstly, use the @import rule to import the Google Fonts library for the ‘Poppins’ font with different weights.
Style the body element to have a background of #555 and a white color. Also, style the h2 element to have center-aligned text, a font size of 30 pixels, and an appropriate margin.
Now, style the unordered list to have a flex display, with flex-wrap as a wrap, centered align-items, and centered justify-content with an appropriate margin for extra spacing.
I then style the list item with the class name ‘category’ to have no list style, background as #333, border-radius of 5 pixels, a pointer cursor, and white color. The active category is styled to have a background of #fcf70f and a black color.
Style the gallery div to have a flex display, with flex-wrap as a wrap and centered justify-content. Also, style the image div to have a hidden overflow and a 5 pixel solid border of white color.
Finally, style the img element to have object-fit as a cover, with a transition of 0.4 seconds to scale the image by a factor of 1.2 on hover.
Copy and paste the following code into the file named style.css:
@import url('https://fonts.googleapis.com/css2?family=Poppins:wght@300;400;500;600&display=swap');

*{
    margin: 0;
    padding: 0;
    box-sizing: border-box;
    font-family: 'Poppins', sans-serif;
}

body{
    background: #555;
    color: white;
}

.container h2{
    text-align: center;
    font-size: 30px;
    margin: 10px 0;
}

.container ul{
    width: 100%;
    display: flex;
    flex-wrap: wrap;
    justify-content: center;
    align-items: center;
    margin: 15px 0;
}

.container ul .category{
    list-style: none;
    padding: 8px 15px;
    margin-right: 15px;
    margin-bottom: 10px;
    background: #333;
    color: white;
    border-radius: 5px;
    cursor: pointer;
}

.container ul .category.active{
    background: #fcf70f;
    color: black;
}

.container .gallery{
    display: flex;
    flex-wrap: wrap;
    justify-content: center;
    margin-bottom: 30px;
}

.container .gallery .image{
    width: 340px;
    height: 200px;
    overflow: hidden;
    margin: 5px;
    border: 5px solid white;
}

.container .gallery .image:hover img{
    transform: scale(1.2);
}

.container .gallery .image img{
    width: 100%;
    height: 100%;
    object-fit: cover;
    transition: 0.4s;
}
By following the above steps carefully, and you will be able to create a filterable image gallery using HTML, CSS, and jQuery. You can get access to the full source code, which is shown in the video, by clicking on the button below.
Conclusion
In this article, we saw how to create a filterable image gallery using HTML, CSS, and jQuery. You can incorporate this into your portfolio designs. I encourage you to build your custom filterable image gallery using HTML.
If you are still stuck somewhere or have any doubts regarding the same, feel free to leave your question in the comment section, and I will be happy to help as soon as possible.
Must Visit: How to Make the Best Video Gallery Using HTML, CSS, and jQuery
FAQ
What is an image gallery?
An image gallery is a collection of images organized in a particular way, often with the intention of displaying them to others. Image galleries showcase a selection of photos with optional captions.
How do I add a photo gallery in HTML?
Create an unordered list with the class name ‘category’ for the filterable categories.
Then, create multiple divs with the class name ‘image’ plus the category to which it belongs inside a div with the class name ‘gallery’. Finally, add the jQuery CDN to add the filtering functionality.
How do I create a gallery grid in HTML?
Style the unordered list to have a flex display, with flex-wrap as wrap, centered align-items, and centered justify-content with an appropriate margin for extra spacing.
Finally, style the gallery div to have a flex display, with flex-wrap as wrap and centered justify-content.
Wow very cool
Thank you